DTF transfers have taken the custom apparel industry by storm, offering a flexible and cost-effective way to produce vibrant, durable prints on a wide range of fabrics. Whether you're a seasoned screen printer looking to expand your offerings or a hobbyist eager to start a side hustle, understanding this technology is crucial. In this guide, I'll walk you through the ins and outs of DTF transfers, sharing practical insights from hands-on experience.
What Are DTF Transfers?
DTF stands for Direct to Film. Essentially, it's a printing method where a design is printed onto a special PET film using a DTF printer and then transferred to fabric using a heat press. Unlike screen printing, which requires separate screens for each color, DTF prints full-color designs in a single pass. The result is a soft, stretchable, and highly detailed print that adheres well to cotton, polyester, blends, and even tricky materials like nylon and leather.
How Does the DTF Process Work?
The process involves several steps, but once you get the hang of it, it's quite straightforward. First, you print your design onto the film using CMYK plus white ink. The white ink acts as a base, ensuring colors pop on dark garments. After printing, you apply a special adhesive powder to the wet ink. The powder is then melted via heat or a curing oven, creating a strong bond. Finally, you cut around the design, weed out the excess film (though some systems allow for pre-cut transfers), and then press it onto your garment at around 300°F for 10-15 seconds.
Why Choose DTF Transfers Over Other Methods?
There are several reasons why DTF has become a favorite among printers and small businesses. Let's break down the key benefits:
- Versatility: DTF works on a broader range of fabrics than many other methods. You can print on dark and light colors without pre-treating the garment, which is a huge time-saver.
- Durability: The adhesive powder creates a strong bond that can withstand repeated washing. In my tests, DTF prints lasted over 30 washes without cracking or fading significantly.
- No Minimum Orders: Unlike screen printing, there's no setup cost for screens, so you can print single items profitably. This is perfect for personalized orders or testing new designs.
- Soft Hand Feel: The prints are soft and flexible, making them comfortable to wear. They don't have the heavy plastisol feel that some screen prints have.
- High Detail: Because it's digital, you can reproduce intricate designs, gradients, and photographs with ease.
Getting Started: Essential Equipment and Materials
To start producing DTF transfers, you'll need some specific equipment. Here's a checklist based on what I've found essential:
- DTF Printer: You can convert a standard Epson printer (like the L1800 or P600) with a DTF conversion kit, or invest in a dedicated DTF printer. Look for one that supports white ink circulation to prevent clogging.
- PET Film: This is the transfer film with a coating that holds the ink. There are different types for different printers, so choose accordingly.
- Adhesive Powder: A hot-melt adhesive ensures the print sticks to the fabric. Choose a fine powder for detailed designs.
- Heat Press: You'll need a heat press capable of reaching 300°F and applying even pressure. A clamshell or swing-away press works well.
- Curing Oven or Heat Gun: To melt and set the adhesive powder, you can use a conveyor dryer, a heat press (with a Teflon sheet), or a specialized powder curing oven. For beginners, a heat gun can suffice, but it's less consistent.
- RIP Software: To print high-quality images, you'll need software like Flexi or Print Factory to manage color profiles and print layouts.
Cost Considerations
Startup costs can range from $2,000 to $10,000 depending on the quality of equipment. Ongoing costs include ink, film, powder, and maintenance. However, the per-print cost is relatively low, especially if you buy in bulk. For a small business, the return on investment can be quick if you price your products appropriately.
Step-by-Step Guide to Making Your First DTF Transfer
Let me walk you through the process I use in my shop. This is the tried-and-true method that yields consistent results.
- Design Preparation: Create or download your design. Ensure it's at least 300 DPI to maintain sharpness. Flip the image horizontally before printing (mirror image).
- Printing: Load the PET film into your printer, ensuring the correct side is up (usually has a subtle texture). Print the design with CMYK and white ink. The white layer is typically printed first, but this depends on your software and printer setup.
- Applying Adhesive Powder: While the ink is still wet, cover the entire printed area with adhesive powder. Shake off the excess and reclaim it for reuse. The powder should stick only to the ink.
- Curing: Place the film in a curing oven or use a heat press with a Teflon sheet to melt the powder. The temperature should be around 160°C (320°F) for about 2 minutes. This melts the powder into a cohesive layer, turning it transparent.
- Weeding: Once cool, cut around your design using scissors or a cutter. You can remove the excess film, leaving just the transfer.
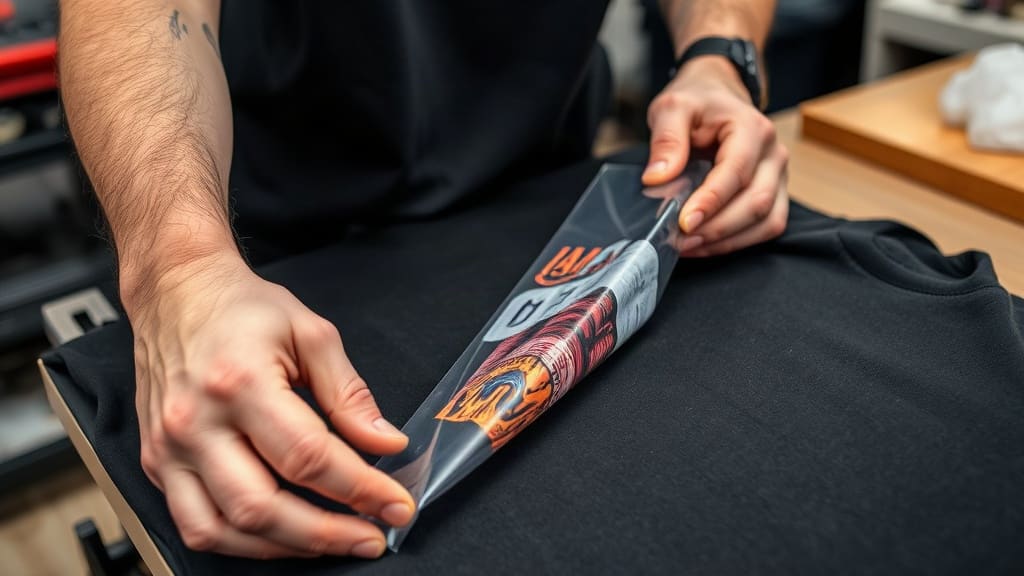
- Pressing: Preheat your garment to remove moisture. Position the transfer on the garment (with the film side up), and press at 300°F for 10-15 seconds with medium to firm pressure. Let it cool for a few seconds, then peel the film away. For best results, use a Teflon sheet to protect the film.
Troubleshooting Common Issues
Even with experience, problems can occur. Here are some common issues and how to fix them:
- Poor Adhesion: If the transfer peels off, your heat press temperature might be too low, or you didn't press long enough. Also, ensure the garment is fully pre-pressed to remove moisture.
- Ink Smudging: This usually happens if the powder isn't fully cured or the film is too hot during peeling. Let it cool completely before peeling.
- White Ink Fading: In DTF, white ink is crucial for dark fabrics. If it's not opaque, check your print settings and ensure the white ink layer is printed correctly.
Creative Applications for DTF Transfers
One of the most exciting aspects is the versatility in applications. Here are some ideas that I've personally explored:
- Custom Apparel: T-shirts, hoodies, and sweatshirts are the most common. But you can also print on hats, bags, and even shoes.
- Promotional Products: Create branded merchandise for events, giveaways, or corporate gifts. The low minimums make it easy to test the waters.
- Personalized Gifts: From family portraits on shirts to custom pet designs, the personal touch is a huge selling point.
- Small Batch Production: If you're an artist or designer, you can produce limited runs of your creations without committing to large quantities.
Maintenance and Best Practices for Longevity
To keep your equipment in top shape and ensure consistent quality, follow these maintenance tips:
- Clean Your Printer Regularly: DTF printers, especially the white ink system, can clog if not used regularly. Perform a nozzle check daily and run a cleaning cycle as needed.
- Store Supplies Properly: Keep film in a cool, dry place away from direct sunlight. Adhesive powder should be sealed to prevent moisture absorption.
- Test Before Bulk Production: Always do a small test print on a scrap fabric to check color and adhesion before running a large order.
Frequently Asked Questions
How long do DTF transfers last on garments?
With proper application and care, DTF transfers can last as long as the garment itself. In my experience, they withstand 30-40 washes without significant cracking or fading, especially when you follow the recommended washing instructions: turn the garment inside out, wash in cold water, and tumble dry low.
Can DTF transfers be used on any fabric?
DTF works well on most fabrics, including cotton, polyester, blends, and even some nylon and leather. However, for very stretchy or delicate fabrics, you may need to adjust the pressing time and temperature. It's always best to test on a small piece first.
What is the difference between DTF and sublimation?
Sublimation requires polyester fabrics or a special coating, and the ink becomes part of the fabric, so it doesn't crack or peel. DTF is more versatile because it can print on cotton and other natural fibers. However, sublimation is often preferred for all-over prints and seamless designs. DTF transfers offer a softer feel on cotton, while sublimation gives a permanent, vivid print on polyester.
Do I need a dedicated DTF printer, or can I convert my existing printer?
You can convert a compatible Epson printer using a DTF conversion kit, which includes a new ink system and software. This is a cost-effective option for beginners. However, dedicated DTF printers often come with features like automatic white ink circulation, which reduces clogging issues. For high-volume production, a dedicated printer is worth the investment.
Is it cheaper to make DTF transfers at home or order them from a supplier?
If you have moderate to high volume, making them at home is cheaper in the long run. The initial equipment cost is high, but the per-print cost is low. If you only need a few prints occasionally, ordering from a supplier might be more cost-effective since you don't have to worry about maintenance and setup. However, having your own system gives you flexibility and faster turnaround times.
DTF transfers are a fantastic addition to any custom printing business. They offer a unique combination of versatility, durability, and cost-effectiveness that is hard to beat. Whether you're just starting or looking to upgrade your current capabilities, I encourage you to give DTF a try. With a bit of practice, you'll be producing stunning prints that your customers will love.