
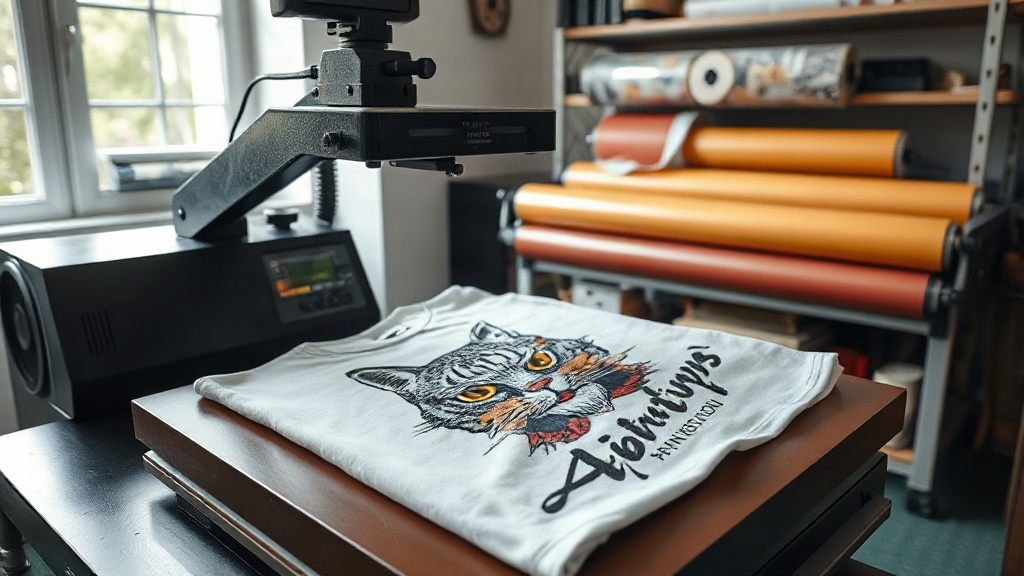
If you've been exploring custom apparel decoration, you've likely encountered the acronym DTF. Short for Direct-to-Film, this printing method has rapidly gained popularity among hobbyists and commercial printers alike. Unlike traditional techniques that require specialized equipment or extensive setup, DTF offers a versatile, cost-effective way to transfer detailed designs onto a wide range of fabrics. In this guide, we'll walk you through everything you need to know to get started with DTF printing, from understanding the process to troubleshooting common issues.
What Exactly Is DTF Printing?
DTF printing is a digital printing process where your design is printed onto a special film, coated with a thermoplastic adhesive powder, and then heat-pressed onto the fabric. The key difference from other transfer methods is that the design is printed onto a film rather than directly onto the garment. This allows for incredible detail, vibrant colors, and the ability to print on fabrics that would be challenging for other methods, such as polyester, blends, and even treated nylon. The film acts as a carrier, and after pressing, the ink and adhesive bond permanently to the fabric, creating a durable, stretchable print.
Why Choose DTF Over Other Printing Methods?
There are several compelling reasons why DTF has become a go-to solution for many print shops. First, it eliminates the need for weeding, a time-consuming step in vinyl cutting. Second, it doesn't require pre-treatment like DTG (Direct-to-Garment) printing, saving both time and chemicals. Third, DTF works on an extensive range of materials, including cotton, polyester, blends, leather, and more. The prints are also highly stretchable, making them ideal for activewear and garments that need to move with the body. Finally, the cost per print is relatively low, especially for short runs, making it accessible for small businesses and individuals.
Materials and Equipment You'll Need
Before diving into DTF printing, gather the essential supplies. You'll need a DTF printer (or access to one), DTF film, DTF ink, adhesive powder, a heat press, and a curing oven or heat gun. The printer is the biggest investment; dedicated DTF printers are available, but some people convert Epson printers with DTF ink systems. The film comes in sheets or rolls, typically with a matte or glossy side. The powder, often TPU-based, is what makes the transfer adhere to the fabric. A heat press capable of reaching 325°F (160°C) is necessary for both curing the powder and applying the transfer.
Choosing the Right Film and Powder
Not all DTF films are created equal. Look for films designed specifically for DTF printing; they have a special coating that accepts the ink and releases it properly during pressing. The powder also matters: finer powders (around 80-100 microns) tend to produce smoother, more detailed prints. Coarser powders may be cheaper but can result in a rougher feel. It's worth experimenting with different brands to see what works best with your printer and fabric types.
Step-by-Step DTF Printing Process
The process can be broken down into several key stages. Here's a detailed walkthrough to help you achieve professional results.
1. Design Preparation
Start with a high-resolution image, ideally 300 DPI, with a transparent background. Mirror the image horizontally before printing, as the film will be flipped when applied. Ensure your design's colors are vibrant; DTF inks are typically CMYK plus white, so avoid relying on spot colors unless your printer supports them.
2. Printing onto Film
Load the DTF film into your printer, ensuring the correct side is facing the printhead. Print the mirrored design. The printer will lay down white ink first (if your design has white areas) followed by color inks. This white layer is crucial for opacity on dark fabrics. After printing, the film may appear wet; that's normal.
3. Applying Adhesive Powder
While the ink is still wet, sprinkle the adhesive powder evenly over the printed area. You can use a powder shaker or a spoon. Gently tilt the film to distribute the powder, then shake off the excess. The powder should only stick to the wet ink. Too much powder can lead to a rough texture, so aim for a light, even coating.
4. Curing the Powder
The powder must be melted to create a permanent bond. Use a curing oven or a heat gun. If using an oven, set it to around 320-330°F (160-165°C) and cure for 2-3 minutes, or until the powder turns glossy and gel-like. A heat gun works too, but keep it moving to avoid scorching the film. Once cured, the film can be stored for later use or pressed immediately.
5. Heat Pressing onto Fabric
Preheat your heat press to 325°F (160°C) with medium pressure. Place the garment on the press, then position the DTF transfer with the printed side down. Press for 10-15 seconds. For the best results, use a Teflon sheet or parchment paper over the transfer to protect it. After pressing, allow the garment to cool completely before peeling the film. Peel in a smooth, consistent motion; if the design lifts, press again for a few more seconds.
Common Challenges and How to Overcome Them
Even with the right equipment, you might run into issues. Here are some common problems and their solutions.
Weak Adhesion or Peeling
If the transfer peels after washing, it's usually due to insufficient pressure, temperature, or time during pressing. Increase the pressure and ensure the press is at the correct temperature. Also, make sure the powder was fully cured; under-cured powder won't bond properly.
Clogged Printheads
DTF inks contain white pigment, which can settle and clog printheads if not used regularly. Perform daily nozzle checks and clean the printhead as needed. If you're not printing frequently, run a maintenance cycle every few days.
Color Fading After Washing
To maintain vibrancy, wash garments inside out in cold water and avoid harsh detergents. Also, ensure your ink is of good quality and that the powder is fully cured. Some printers allow you to adjust ink limits; too little ink can lead to dull colors.
Tips for Vibrant, Durable DTF Transfers
To get the most out of your DTF printing, keep these best practices in mind. Always test on a scrap piece of fabric before pressing onto a final garment. Store unused film in a cool, dry place to prevent moisture damage. Keep your printer clean and perform regular maintenance. Use a heat press with accurate temperature control; a cheap press can cause inconsistent results. Finally, experiment with different powder types and pressing parameters to find what works best for your specific fabrics and designs.
Frequently Asked Questions
Can I use DTF printing on 100% cotton shirts?
Absolutely. DTF transfers adhere well to cotton, as well as polyester and blends. The key is to ensure the fabric is clean and flat before pressing. For cotton, a slightly higher pressure may be needed to push the adhesive into the fibers.
How long do DTF prints last?
With proper application and care, DTF prints can last as long as the garment itself. They are resistant to cracking and peeling when washed correctly. Avoid ironing directly on the print and tumble dry on low heat.
Do I need a special printer for DTF?
You can use a dedicated DTF printer or convert a standard inkjet printer (like certain Epson models) with a DTF ink system and film. However, dedicated printers are optimized for DTF and often yield better results with less hassle.
What is the difference between DTF and DTG?
DTF involves printing onto a film and then transferring to the fabric, while DTG (Direct-to-Garment) prints directly onto the garment. DTF works on more fabric types and doesn't require pre-treatment, but DTG can produce a softer feel on cotton.
Can I reuse DTF film?
No, DTF film is designed for single use. Once the transfer is pressed, the film cannot be reused. However, you can print multiple transfers on a single sheet if your design fits.